So you're planning your lessons for the future and you know you want to use technology in your class room because it's the new thing that everyone is doing... the problem is your school doesn't have iPads or laptop/notebooks for every students. Never fear! All you need are cameras!
In this day and age most students (
Study) have a smart phone of some capacity with most carrying the ability to take photos. This provides the way in where school budgets perhaps can't. Photo taking abilities in the classroom can enhance and alter the way an activity is conducted, however there needs to be a common understanding of why the camera/phones are being used, and also what is considered an appropriate use of these tools.
 |
| The variety of smart phones available is astounding... |
Taking the time with your students to discuss and develop a set of agreed upon terms regarding the potential use of camera/phones within certain lessons is well worth the time. When all students feel that they have had a say in what will be the governing rules over a tool that they will be allowed to bring into the classroom they certainly feel the experience is more authentic overall. Never assume that they will know instantly what is appropriate and what is not when it comes to the taking of photos and the use of phones within the classroom.
Good questions to ask when developing guidelines for phone/cameras include:
- Should permission be sought prior to taking a photo of someone? Why/Why not?
- What should be done with photos once they are taken?
- How can we use these to our advantage in class?
So now you've all agreed on rules regarding the use of cameras within the classroom... where to from here?
How about the following ideas:
- Photo clue orienteering
- Trio Film Coaches
What is....
Photo Clue Orienteering/Scavenger Hunting...
The school ground becomes the hunting grounds as you provide your students with cryptic clues for them to solve. This can be done a variety of ways with the aim of the challenge for students to make their way from one place to another via the clues provided.
I always start with this activity when looking at an orienteering unit. It's a great lead in activity and by the end you can have students discussing the difference between orienteering, rogaining and scavenger hunting. The only down side to this activity is the prep work you as the teacher needs to do prior to the unit, however set it up properly the first time and you can have a handy activity to repeat year after year.
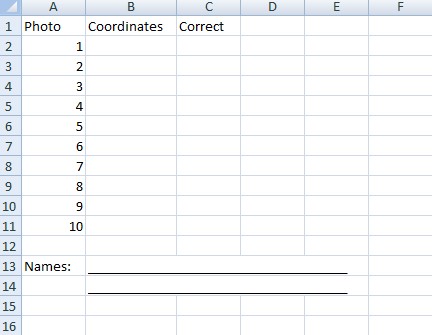
Prep work: Prior to teaching the unit you will need to photograph your cryptic photo clues. I went around the school and took about 20-30 random photos of odd little things that exist in the school. I took photos of the tops of poles, edges of buildings or signs, parts of fencing, taps and drains. The aim of the photos taken is that they are hard to determine what they are at first glance. I then printed and laminated 5 copies of each photo with a number assigned to the back of each. I also created a tabled sheet that had as many rows as there are photos and three columns for students to track their progress. The last thing I created was an aerial map view of the school via Google Maps. I put a simple grid over the map image and created coordinates for the map. I then printed and laminated around 8 of these.
 |
| Example of map |
 |
| Example of results form given to students |
Activity in action: After introducing what the aim of scavenger hunting is I asked the students to get into teams of no more than 4.
Each team needs to ensure they have:
- someone with the ability to take photos
- someone to record coordinates of located photo clues
- someone to carry and read the map
- someone to hold onto the cryptic clues that they are given by the teacher.
I then hand each team 2 of the many different photo clues and send them out with the following challenge "Step 1: Get a photo that shows the cryptic clue and it's surroundings and include your team in the photo.
Step2: Try to determine which square on your map grid the location of your clue is at and record it on your sheet."
 |
| Cryptic Clue example |
 |
| Example of photo to be taken including team,cryptic clue and it's surroundings |
What happens next is students take off running to where they think they remember seeing something in the school that resembles the cryptic clue. The photograph becomes evidence to show they made it to each destination. If a cryptic clue card proves to be too hard they can trade it in for a different card at any time. The beauty of having them return to base after finding each 2 clues means you can control how long they have until times up. An alternative option is to print the clues onto a sheet and number the photos on the sheet and provide each team with all the clues and an end time when they need to return to base (the classroom).
The next step after they've had a blast running around doing this activity is to have them create their own set of cryptic clues to challenge another team with. I've even had students use photo editing apps on their phones to change the colours of their clues or alter them slightly for added difficulty.
What is....
Trio Film Coaches...
Trio Film Coaches is a great way to use photo/video analysis during skill development when doing any sport unit.
Simply have students break into threes and provide them with a series of skills to practice. They are to take it in turns to practice a skill whilst one of the three films the skill. Threes work best as one can film whilst the other two act on the skill, this is particularly handy for most team related sports. The trick to getting this working well is to set a routine that stays the same regardless of the sport unit being looked at. Prep work is minimal but the benefits of the activity are immense.
Prep work: Be prepared to model this first so that students are aware of the aim and potential outcomes of doing such an activity. If you have time, film yourself twice performing a skill prior to the
lesson. Have one film of you performing a skill incorrectly and one film
of you performing a skill correctly and show it to the class then open up discussion "which was the correct way to perform that skill? Why do you say this? What benefit can we get from watching ourselves perform a skill?"
Inform students that they will be working together in threes to film themselves performing different skills throughout the year to reflect on their skill development. Be sure to develop a routine when it comes to film sessions so that you only need to announce to students to get into their trios and they'll then know to repeat what they have done previously.
For analysis you can create either a peer assessment form for the two coaches of the third person to fill out regarding the person they filmed OR alternatively a self evaluation form where students use the video and any advice from their peers to analyse their performance of the skill and highlight where things went right and what needs to be improved.
Activity in action: Introduce the skills you wish to be the focus of the session (Softball pitch). Demonstrate the skill correctly and highlight the main teaching points of the skill as per usual. Have students practice the skill as you normally would. Before moving onto the next skill that you would teach during the unit stop and announce that the drill they just practised is this unit's "skill to film" and ask them to get into their trios.
Students then have the opportunity to film each other performing the skill they just practised and then time after the filming is set aside to analyse and evaluate.
The next step of course is to get your hands on some great video analysing apps that allow you to draw on the video to get angles of release, lines and angles of limb positions, weight and balance movement etc I personally use Excelade and Swing Plane HD on the iPad. Coaches Eye is another ripper too.
There are of course hundreds of different ways to use cameras or smart phones within the classroom to enhance the learning experience. In future blog posts I'll be sure to explain Google Goggles, QR Codes and other handy apps so be sure to stay tuned.
If you like what you've read, share it around with others. If you have a question be sure to ask in the comments section. If you've got a suggestion for a lesson idea let us know that too! Until next time peace out!


 QR Droid




 Posts
Posts

